

Introduction:
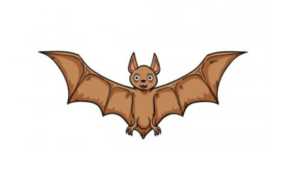
Draw A Bat: Drawing is a wonderful technique for conveying imaginativeness and restoring your inventive psyche. The bat is one enamoring and puzzling creature that has gotten human interest for quite a while. With its clever appearance and critical work in various natural frameworks, bats are a fascinating subject to draw. This small step-at-a-time guide will walk you through drawing a bat, helping you get its encapsulation and character on paper. Please check out these free Turkey coloring pages.
Materials You’ll Need
Before we bounce into the drawing framework, could we guarantee you have all of the indispensable materials arranged:
Paper: Pick a kind of paper that suits your inclination toward drawing medium. A sketchpad or drawing paper will work commendably.
Pencils: Many graphite pencils going from 2H (hard) to 6B (fragile) will give you different hiding decisions.
Eraser: Guarantee you have a nice quality eraser to address mistakes or blotch.
Reference Picture: A reference image of a bat will help you sort out the creature’s life designs and components.
Since you have your materials arranged, let’s begin the one small step at a time course of drawing a bat.
Stage 1: Essential Outline
Start by delicately depicting a fundamental diagram of the bat’s body. Begin with a circle for the head and a delayed oval for the body. Position the head fairly over the body, as bats have a specific head shape.
Stage 2: Wing Development
Bats are known for their significant wingspan. Draw two tremendous, twisted lines loosening from each side of the bat’s body. These lines will address the wings. Remember that a bat’s wing is planned like a human hand, with extended fingers related to a petite layer.
Stage 3: Head Nuances
As of now, we should add a couple of components to the bat’s head. Draw two little circles for the eyes, arranging them at the most elevated mark of the head circle. Underneath the eyes, sketch a minute three-sided nose and a little mouth. Bats regularly have indisputable facial characteristics and center around the reference picture for their uncommon look.
Stage 4: Ears and Facial Components
Bats are known for their observable ears, which come in various shapes depending on the species. Sketch the ears on either side of the bat’s head. Depending on the bat you’re drawing, you can make them pointed, changed, or exaggerated.
Stage 5: Wing Nuances
To add realness to your bat drawing, based on the wing nuances. Inside the wing structure, sketch the outlines of the extended fingers. These fingers furnish bats with their ability to fly. In like manner, add two or three bowed lines to address the slight layer that stretches between the fingers. This will give your bat wings a more exact appearance.
Stage 6: Body and Fur Surface
Update the outer layer of the bat’s fur by adding a couple of fundamental lines and strokes along the body. Bats have fur covering their bodies, and these lines will help convey the surface and part of the fur. Be careful not to go crazy — honest strokes will work best.
Stage 7: Get done with Wing Nuances
Refine the wing nuances by adding more definition to the finger bones and the layer. Use light disguising to show the slimness of the film and add a covering to the locale where the wings get over the body.
Stage 8: Dark and Portray
Once content with the fundamental development and nuances, start darkening the lines to give your bat drawing greater significance and definition. Use a gentler pencil, similar to a 2B or 4B, to achieve more extreme shadows and separations.
Stage 9: Covering and Significance
Base on hiding different areas of the bat to make significance and volume. Focus on your reference picture to suitably decide the light source and shade. The districts closer to the body will be hazier, while the areas farther away will be lighter.
Stage 10: Last Contacts
Add any last contact to your bat drawing, such as refining the facial features, changing the wing nuances, and underlining explicit surfaces. Study your fascination with checking whether any locales need further refinement or disguising.
End:
Causing a bat hopes to see the detail and a sharp impression of the creature’s life frameworks and characteristics. Following this little-by-little aid and using a reference picture, you can make a sensible and delightful picture of a bat on paper. Remember that preparing is basic to fostering your abilities to draw, so don’t hold back at all to have a go at drawing different bat species and attempting various things with various disguising systems. Happy drawing! For more information, please Click Here!
